Marvelous Masonry Egypt
Words: David BiggsEditor’s Note: This unmodified edition of Marvelous Masonry originally ran in MASONRY Magazine. We hope you enjoy the historic information and specifics on architecture and construction provided by MASONRY DESIGN columnist David Biggs.
Thank you for the positive comments we’ve received about these articles. It’s great to see how many enjoy our masonry heritage. This month we’ll be visiting Egypt. Even if you’ve never visited Egypt, you probably recognize the pyramids and the Sphinx. We will go there and visit many more.
Egypt was a center of modern civilization beginning from about 3,000 BC. It was conquered by Alexander the Great, the ruler of Macedonia in 332 BC and was ruled by the Greeks until it was taken over by the Roman Empire approximately 30 BC. Roman control lasted until c. 640 AD. So, most of the marvelous Egyptian monuments that exist today date to the time period from 3,000 BC to 600 AD.
From a materials perspective, the ancient masonry temples are either sandstone or limestone with decorative granite statues and trim. We’ll also see mud bricks laid in mud mortar. For more information on the stone quarries, see http://www.eeescience.utoledo.edu/Faculty/Harrell/Egypt/Quarries/Quarries_Menu.html.
Television and You Tube allow us to travel “virtually” anywhere. However, seeing monuments up close is a thrill. My work in Egypt preceded the Arab Spring of 2011. I visited all of the sites either individually or with an international team of preservation experts, except for Abu Simbel (bucket list).
Figure 1 has a map of northern Africa with Egypt with the Nile. Figure 2 shows Egypt with many of our stops along the Nile identified. Egypt’s earliest development was concentrated along the Nile for commerce and transportation. In the ancient Egyptian language, Nile means “the river”. It seems odd today to call it the Nile River.
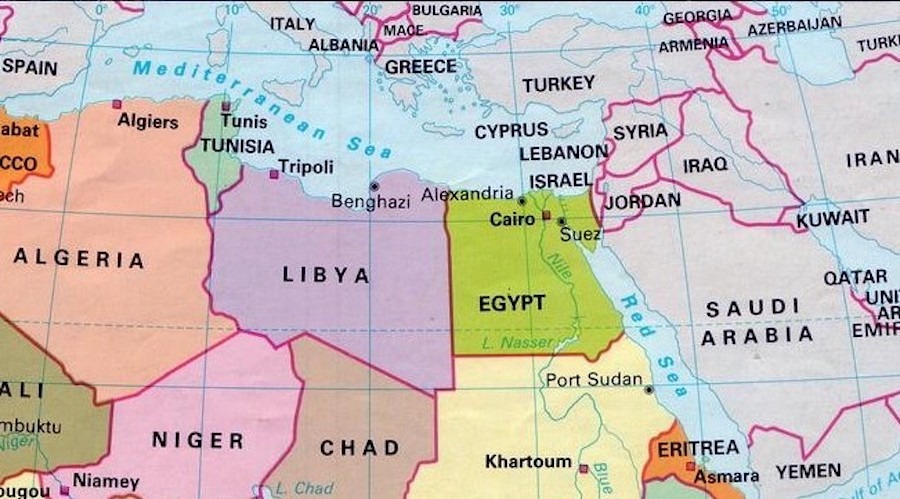

Figure 1- Northern Africa and Egypt (Credit: Prof. Jeremy Lewis, Huntingdon College)
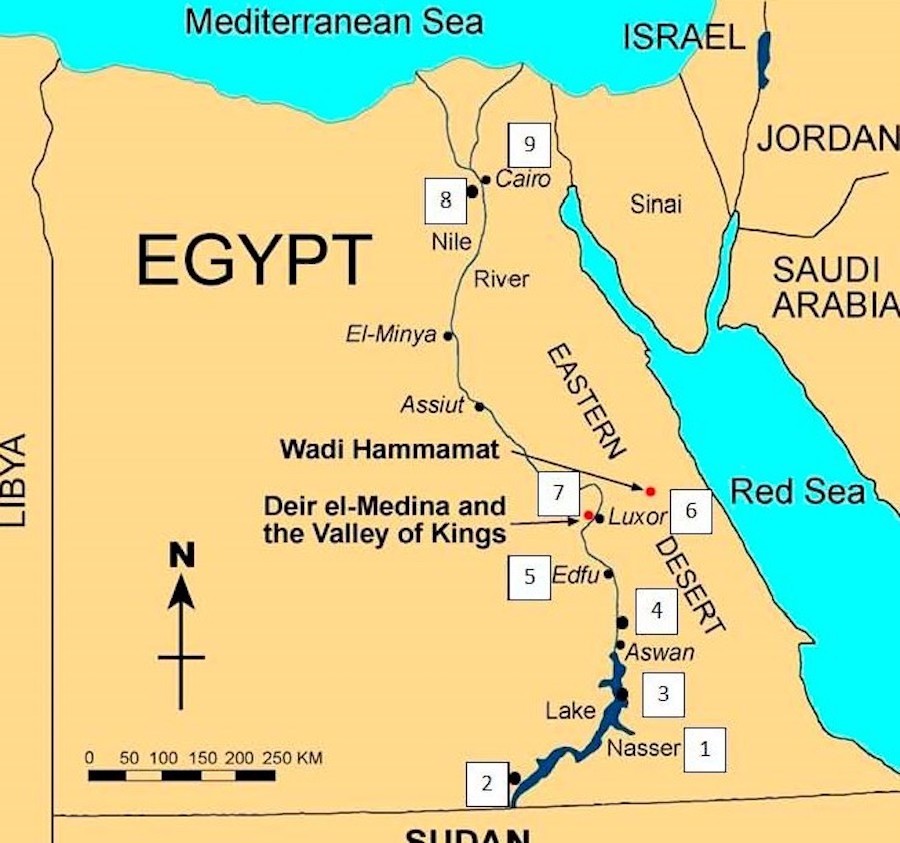
Figure 2 - Egypt (Credit: Dr. James A. Harrell, University of Toledo)
The Nile flows from the south to the Mediterranean Sea. In ancient times, Upper Egypt refers to the upstream area and Lower Egypt is downstream. The Nile is the water source for Egypt, but historically yearly flooding brought destruction.
Egyptians considered constructing a dam to control flooding as early as the 11thcentury but the first dam at Aswan (Low Dam) was not constructed until 1898-1902. Flooding continued and a second dam (High Dam) was needed. With Russian financing, that dam was built in 1960-1976 for both flood protection and hydroelectric power. This High Dam created Lake Nasser (#1 on the map) and that’s where our discussion of masonry monuments begins.
Lake Nasser formed from nearly 300 miles of the Nile; an area of approximately 2,000 sq. miles. Numerous historic sites were also flooded. With assistance from the United Nation and many countries, several of these sites were saved.
Figure 3 (#2 on the map) shows the entrance to Abu Simbel, a temple to Ramesses II. This site was originally carved into a stone mountain in c.1220 BC. In the 1960s with assistance from the United Nations (UNESCO), the temple was cut into pieces and reconstructed at its current location above the lake. The magnificent stone temple seen today took over four years to recreate.
Many of you will be amazed with the story of moving and restoring the temple. Imagine rebuilding all the statues you see and hiding all the newly created joints. One video on this monumental effort can be found at https://www.youtube.com/watch?v=2SxLufRZr4c. You’ll be surprised at what is inside the entrance too.
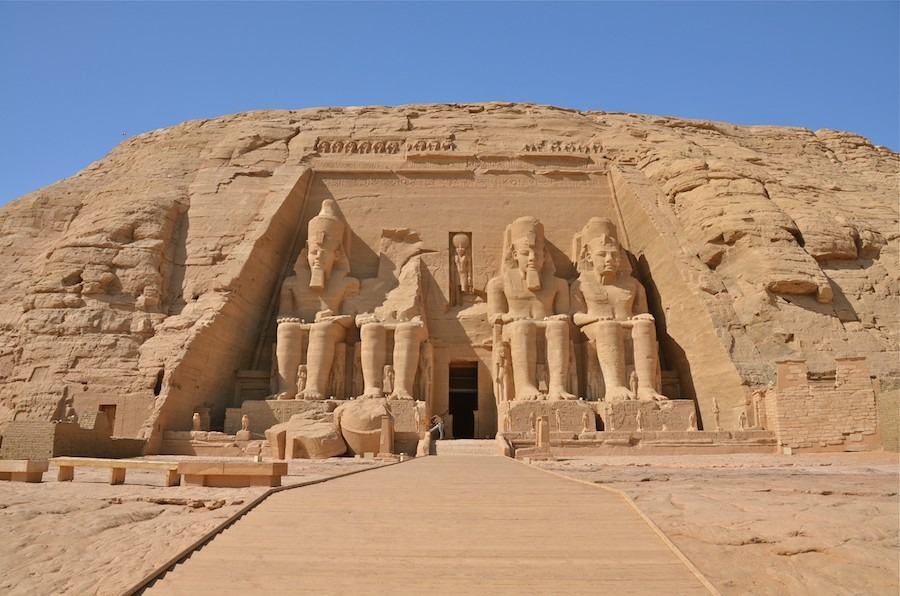
Figure 3 - The entrance at Abu Simbel (Credit- Ignatius Tan/Shutterstock.com)
Figure 4 shows a view from the lake of the Temple of Isis (#3 on the map) which is another complete reconstruction. The temple structures were moved from Philae Island to Agilika Island to also avoid being flooded by Lake Nasser.
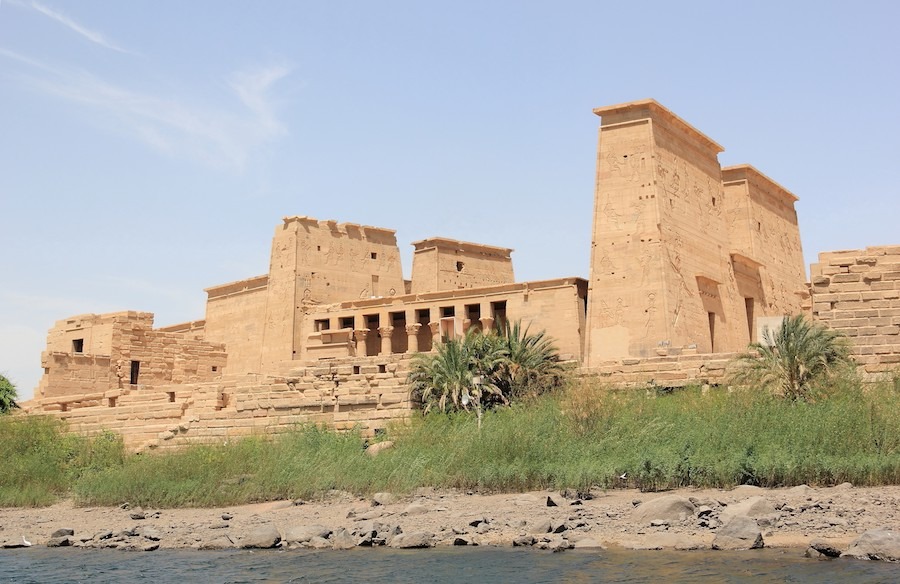
Figure 4 – Temple of Isis now on the Agilika Island (Credit: eugen_z/Shutterstock.com)
The site has construction from both the Egyptians and the Romans dating from 616 BC to 30BC. Reportedly, this was the last temple built in ancient Egypt. Figure 5 shows the colonnade on the left side of Figure 4. Figure 6 shows the pylons of the temple. Look closely and imagine identifying every piece of stone, dismantling every stone, and transporting them to this island for rebuilding. Even the loose stones pieces which appear randomly placed on the ground were placed in the same relative position where they were found on Philae.
Figure 7 shows the remains of Trajan’s Kiosk. It’s no surprise the timber roof and trusses have not survived. But, we still have the marvelous masonry. Figure 8 is a close-up of the stone carving on the right pylon.
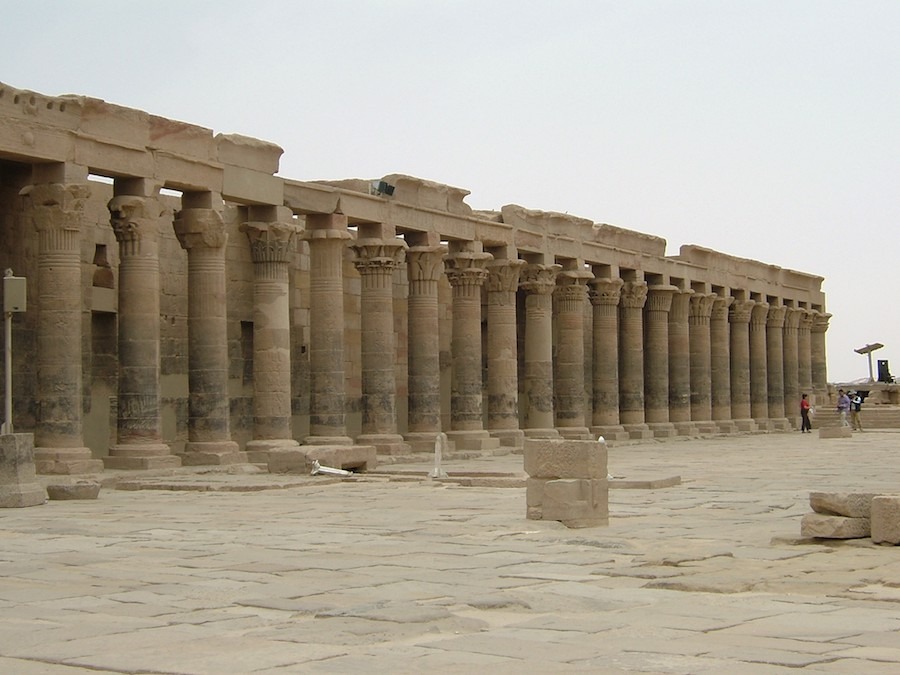
Figure 5 – Colonnade of Philae Temple
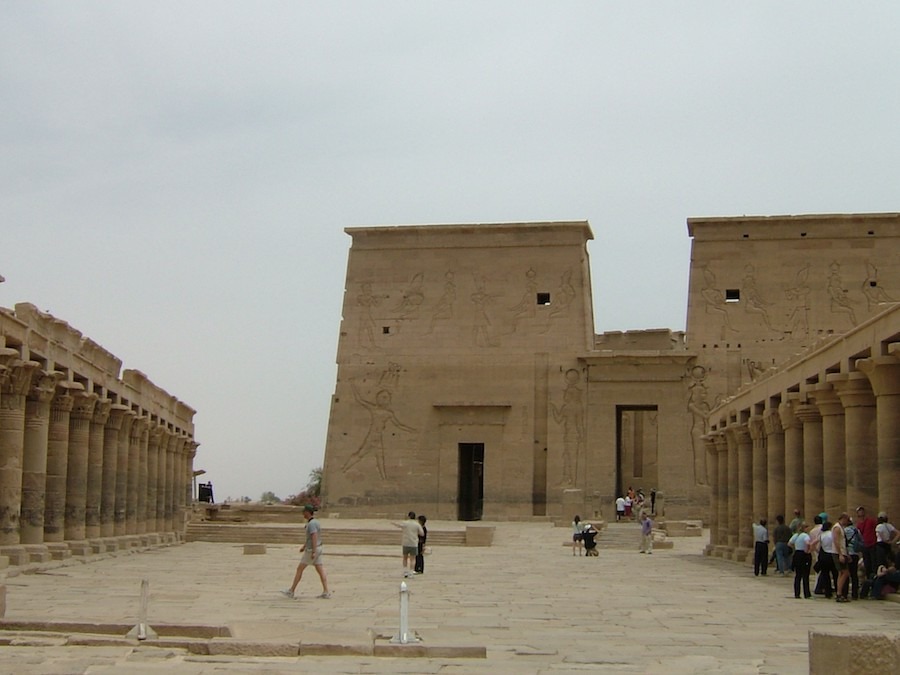
Figure 6 – The Philae Temple
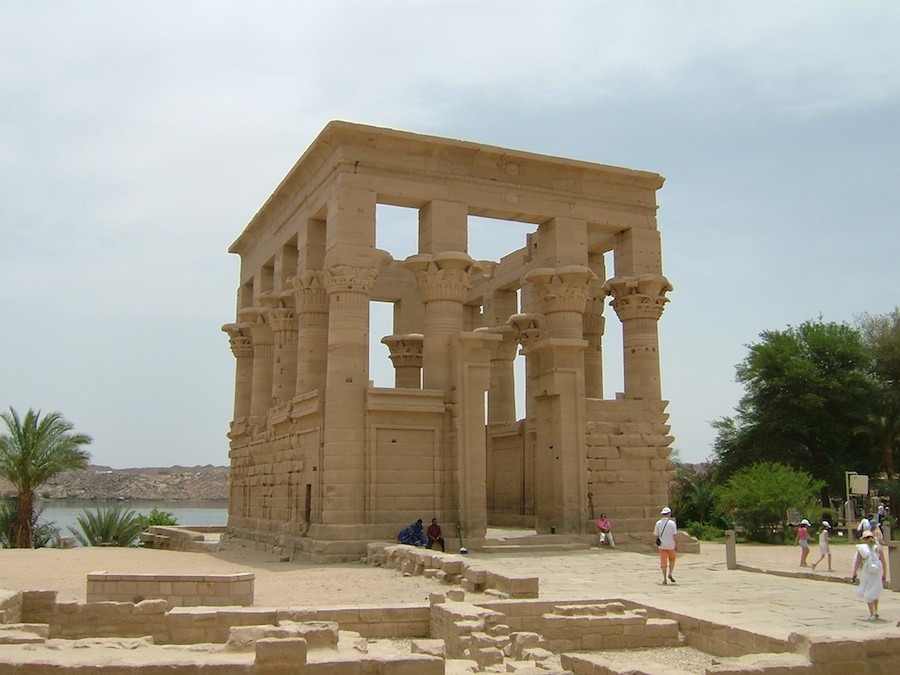
Figure 7 - Trajan’s Kiosk
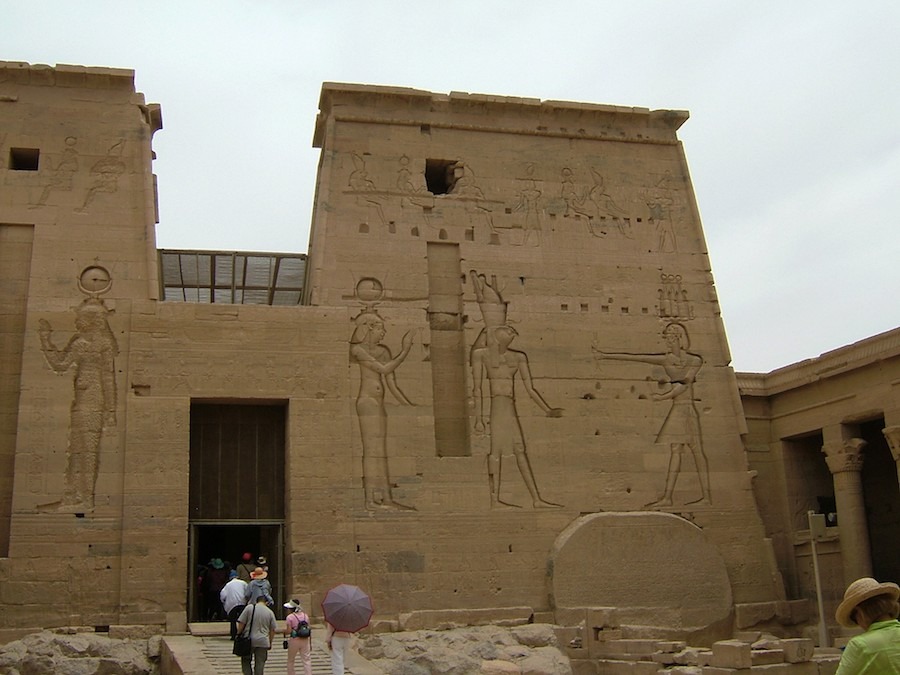
Figure 8 – Carvings on Pylon
This was a short visit to Lake Nasser. But, the message is to not bypass the marvelous masonry structures of Lake Nasser if you are able to visit this amazing country.
Proceeding down the Nile (heading north) from the Aswan Dam, there are numerous sites to visit. Figure 9 shows the temple of Kom Ombo (#4 on map). Here we final a double temple constructed c. 100 BC that was buried by Nile flooding, excavated during the 1800s, and damaged by a 1992 earthquake. Several noteworthy items:
- We see stone patches and repairs where there was no attempt to mask the work (see smooth finish of surfaces on Figure 10).
- There is an engraved stone image of what is thought to be the first representation of medical instruments for performing surgery.
- We find stone anchors of wood made from Lebanese cypress that are over 2,000 years old. Figure 11 shows a row of stones with dovetail cutouts for the anchors. Figure 12 shows one of the original wooden anchors still intact at the site and a photograph of an anchor on display at the Egyptian Museum. I considered this to be one of my most amazing finds in Egypt!
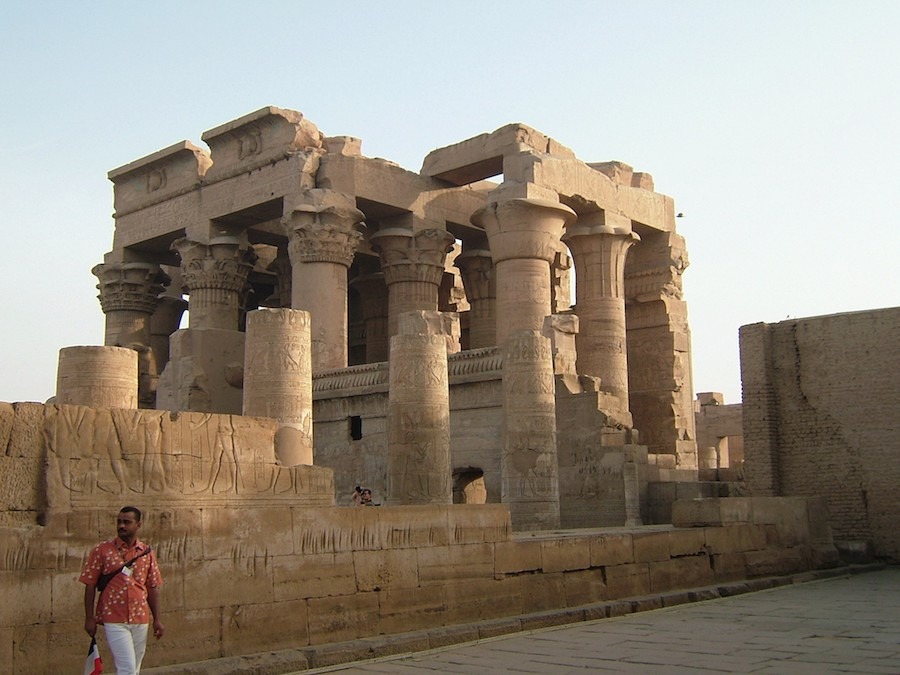
Figure 9 – Temple at Kim Ombo
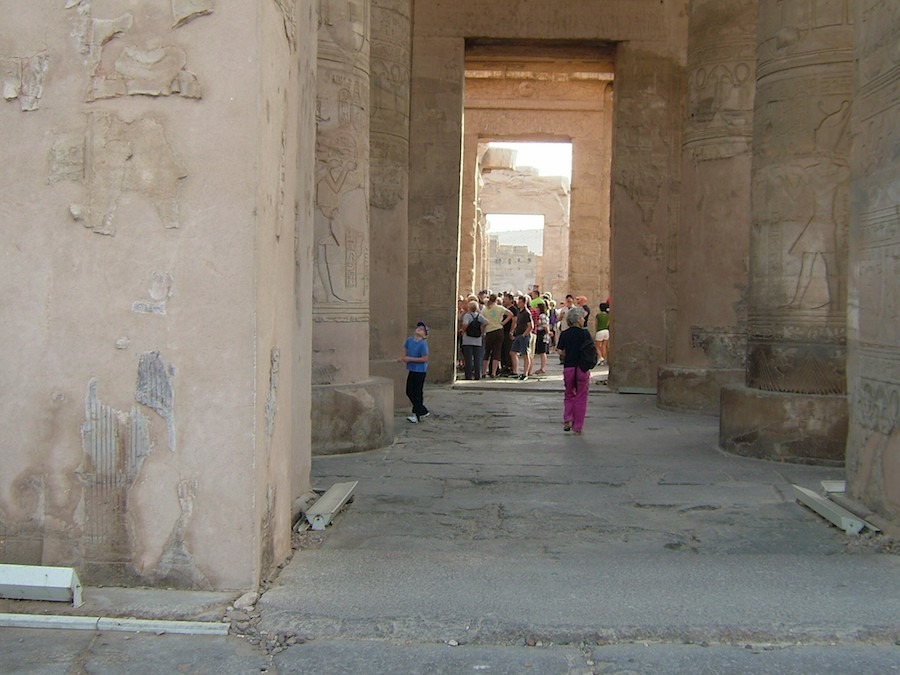
Figure 10 – Repaired walls and columns
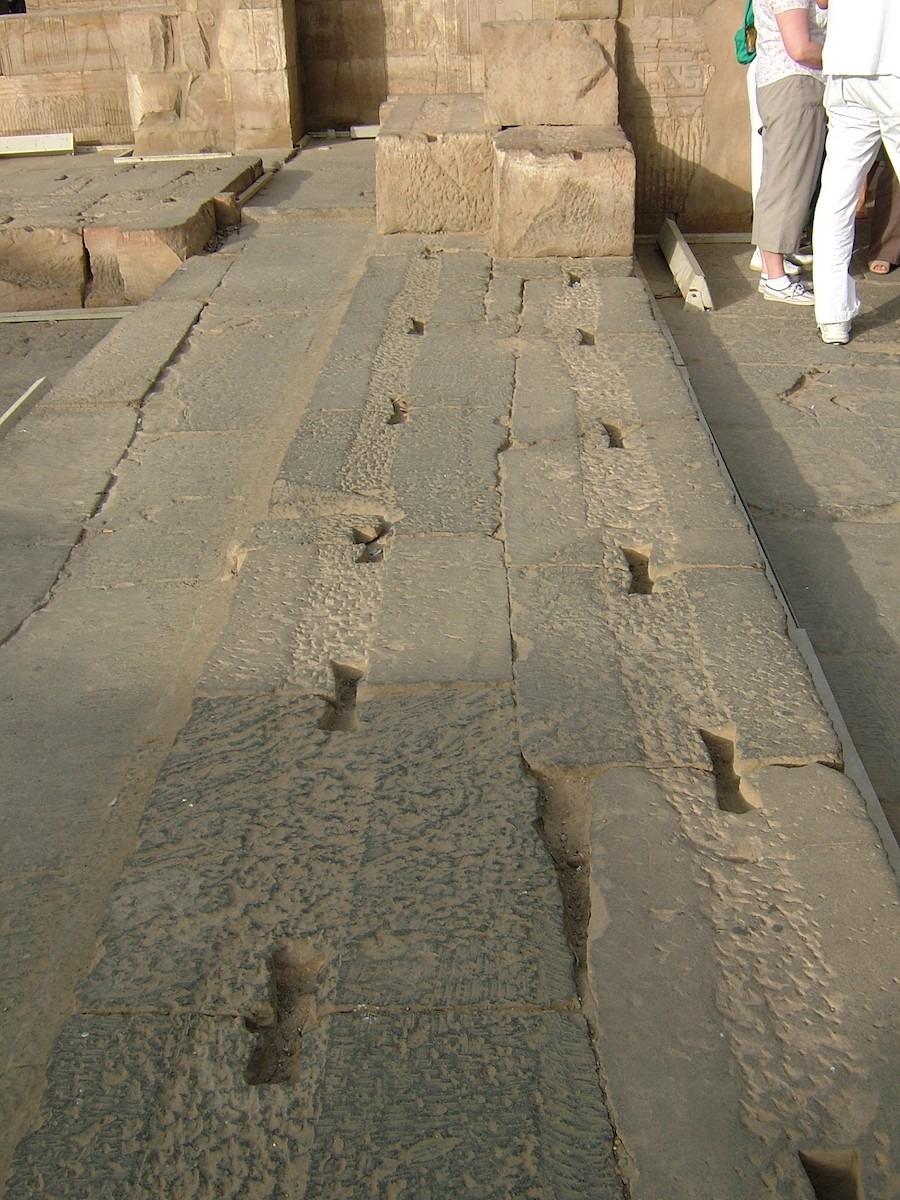
Figure 11 - Dovetail cutouts in stone
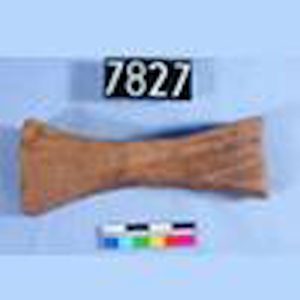
Figure 12- Stone anchor
Our next stop is the Temple of Edfu (#5 on the map). Constructed 237 BC to 57 BC, the temple was partially desecrated and burned by Christians about 391 AD. It later became buried approximately 39 feet deep in drifting desert sand and Nile sediment. The temple is considered the most well-preserved ancient monument in Egypt. Inscriptions inside provide rare details of its construction as well as other building campaigns.
Figure 13 shows the entrance to the temple. Like most of the temples, this too is sandstone. Figure 14 shows the exquisite statue of a falcon that is just to the left of the entry.
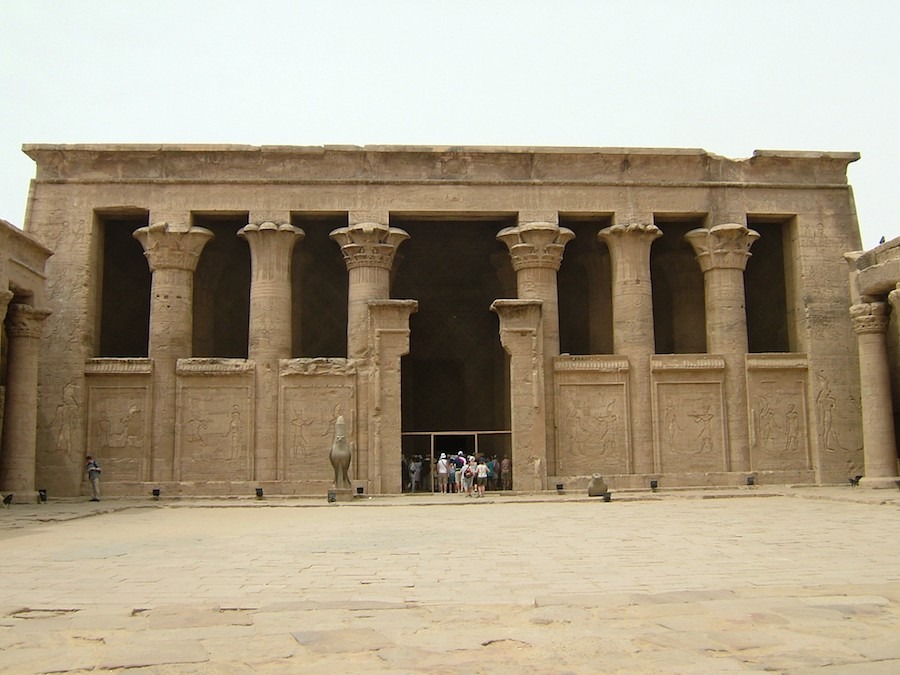
Figure 13 – Temple of Edfu
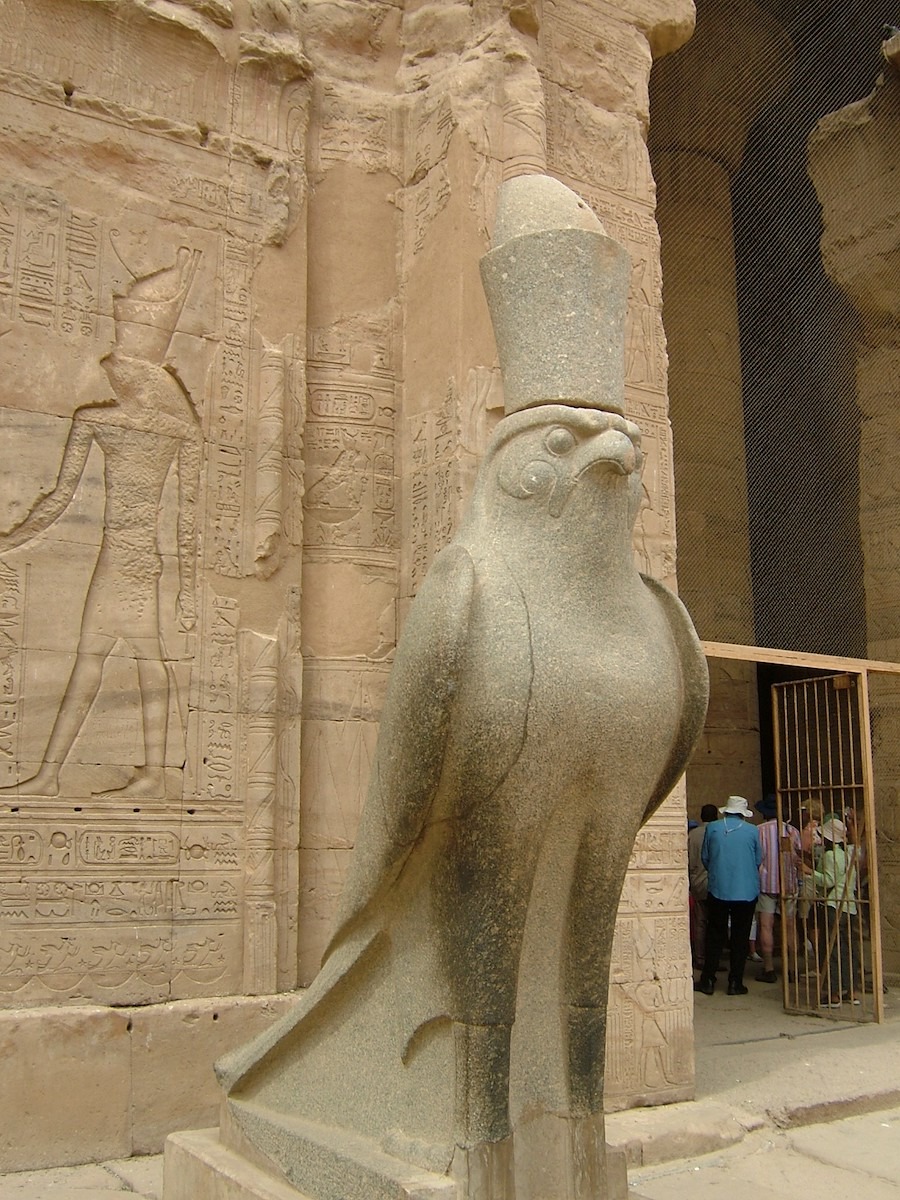
Figure 14 – Granite falcon
When archeologists discovered the temple in 1798, they found houses on the fill over the temple with only portions of the pylons (Figure 15) showing. Being buried helped preserve the stone structures. The cracking on the pylons are due to earthquakes since the temple was excavated.
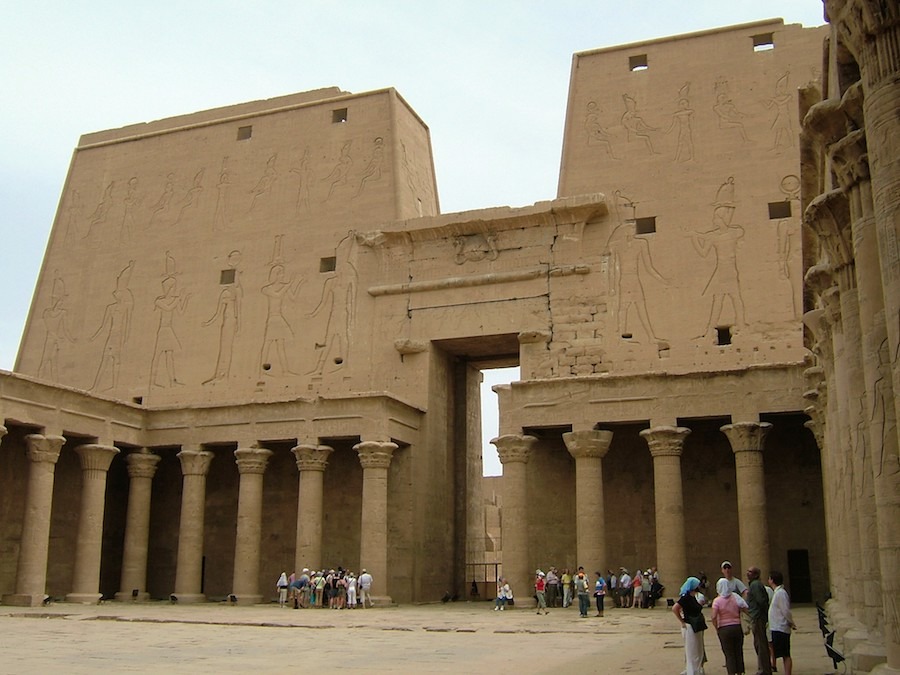
Figure 15 – East entry and pylons
19thand 20thcentury construction adjacent to the temples has used stone and mud bricks to build large walls (Figure 16). The bricks (Figure 17) of clay and straw are laid in mud mortar and headered every two to four courses. The walls are four or more six wythes wide; an amazing example of masonry construction themselves.

Figure 16– Stone and mud brick walls
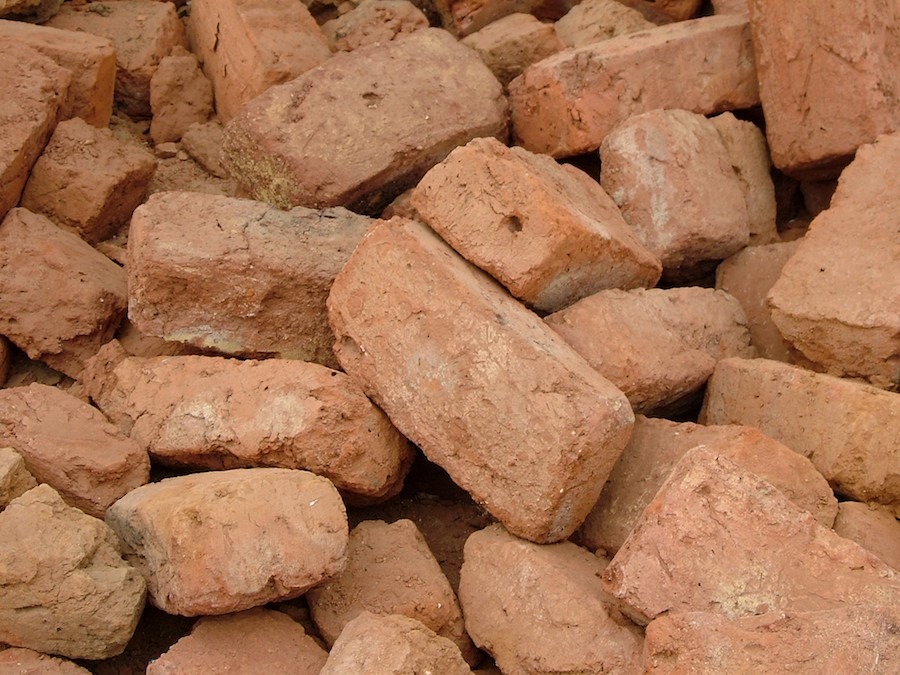
Figure 17 – Mud bricks
The Edfu area is still a very active archeological site. Recent finds indicate the city is older and much larger than was previously known.
Continuing our journey, we travel to the famous area of Luxor (#6 on the map). First we’ll visit the Temple of Karnak; reportedly the largest religious complex ever built with about 200 acres. Built over a very long time (3200 BC to around 100 AD), the complex is sandstone construction on a massive scale.
There are six entrances to the complex. Figure 18 shows the enormous west entrance pylons; bigger than any we’d seen before. Where I am standing taking the photograph was once a canal from the Nile where barges brought in the stone.
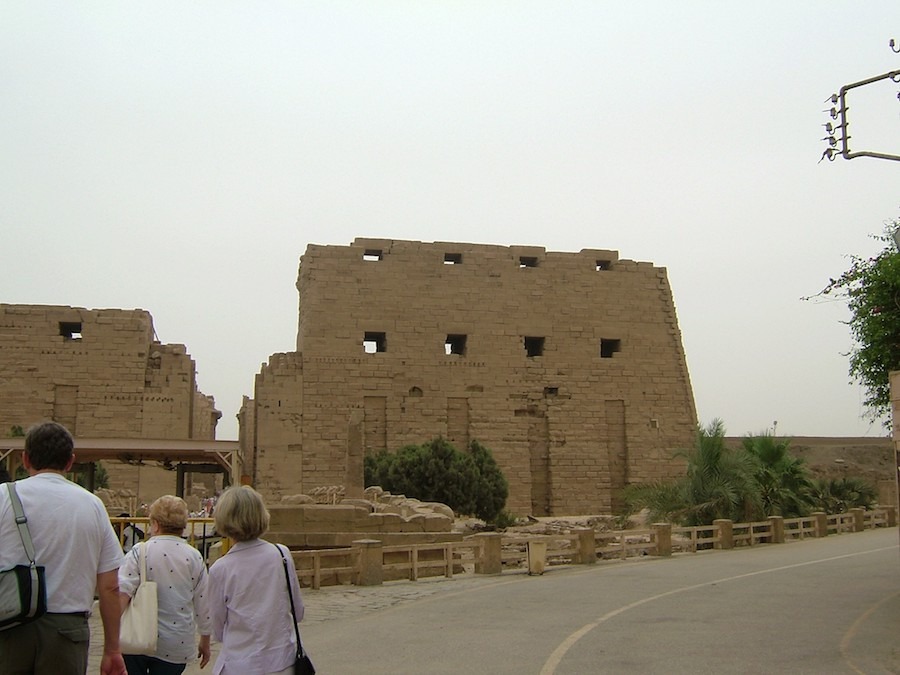
Figure 18 – Temple of Karnak
Inside the entrance, we get a look back at the pylon wall (Figure 19). There are still mud bricks that created a ramp to get the stones high up on the walls. The wall was never fully completed yet it is about 120 tall. Imagine building that wall in the US without any scaffolding or heavy equipment.
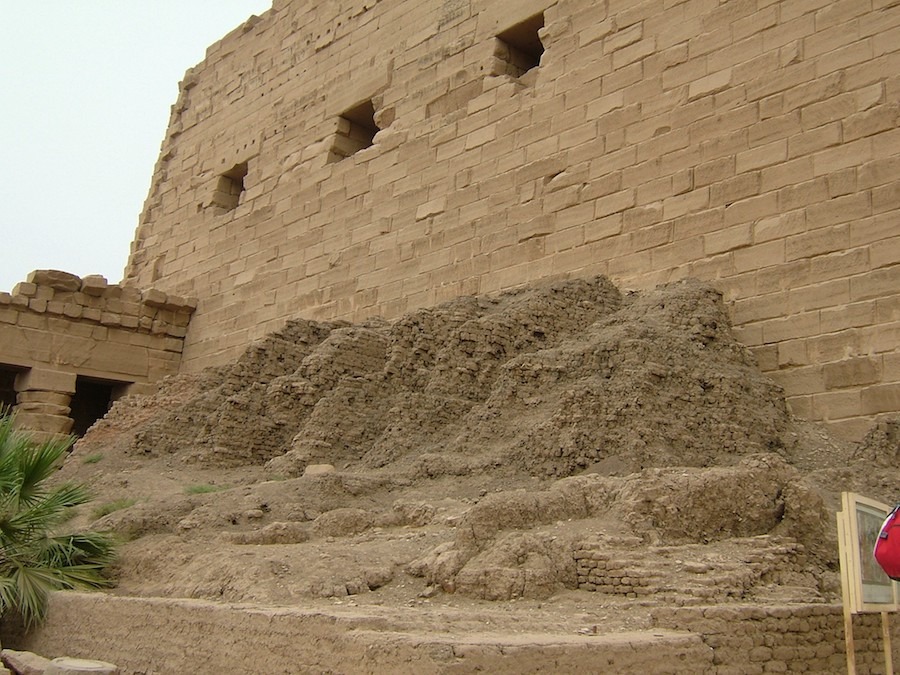
Figure 19 – Mud brick ramps
Figure 20 is probably one of my favorite ancient masonry photographs. Look at the columns from right to left. From this you, we learn that the builders erected rough blocks of sandstone and then proceeded to carve them into their final shape.

Figure 20 – Column carving
Within the complex is the Great Hypostyle Hall (c.192 BC); its 134 columns that vary between 50 and 70 feet tall. Figure 21 shows some of the columns. Up high, we see the origination of the modern clerestory to let light in above. Notice that the smooth patches on the columns do not hide the repairs.
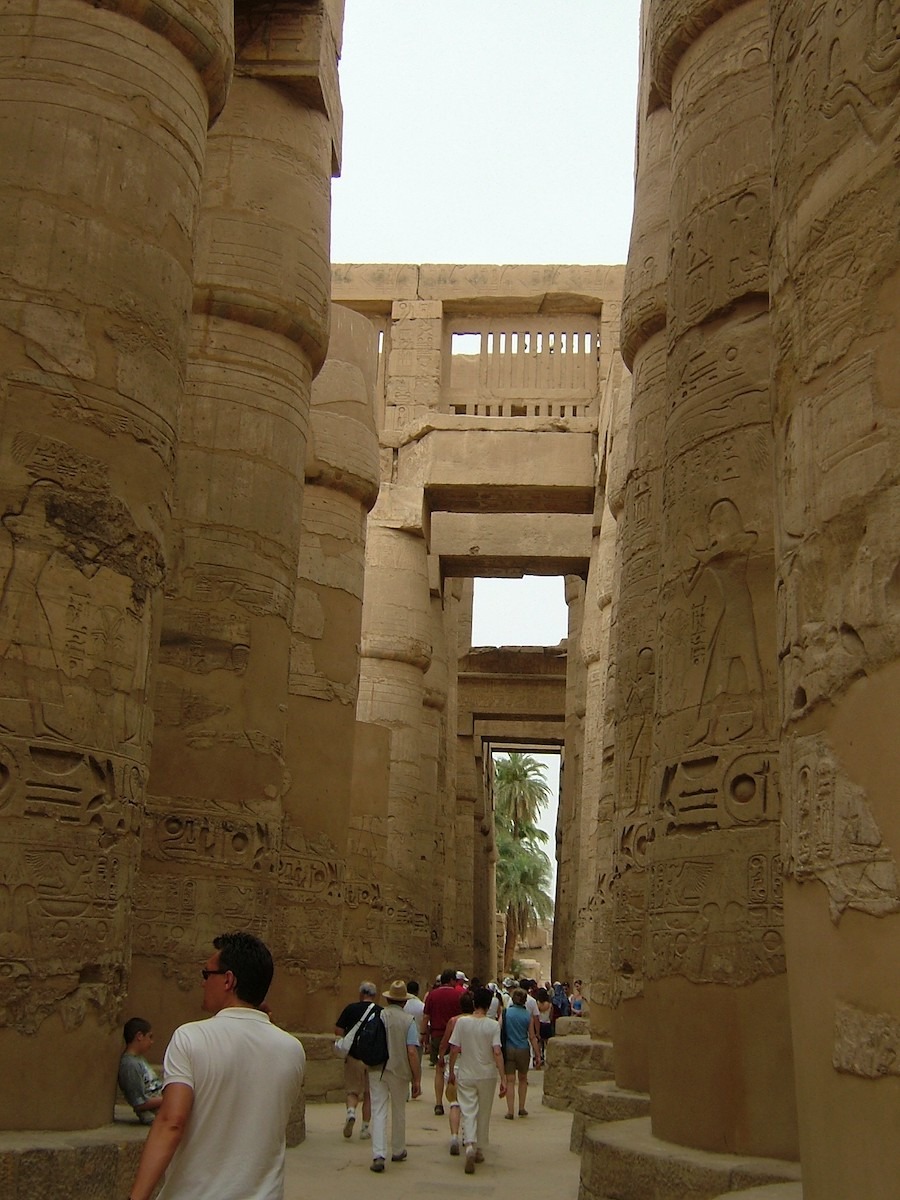
Figure 21 – Columns of Hypostyle Hall
While these photographs show bare sandstone with intricate carvings, the original construction (columns and walls) was actually very colorful. Figures 22 and 23 show some of the original colors than have survived. For ancient monuments, this is only possible with masonry.
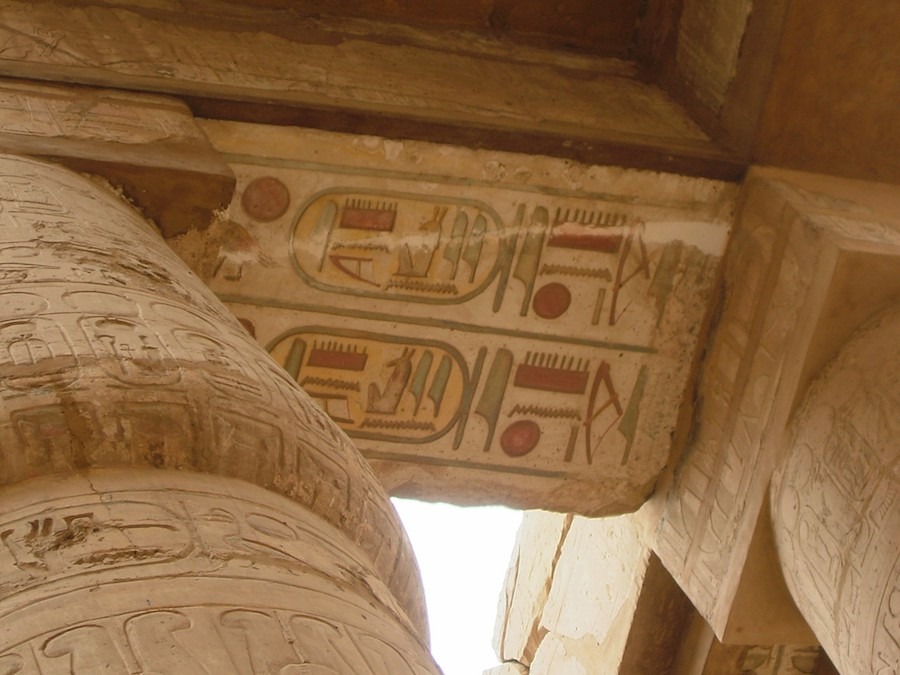
Figure 22 – Underside of an architrave
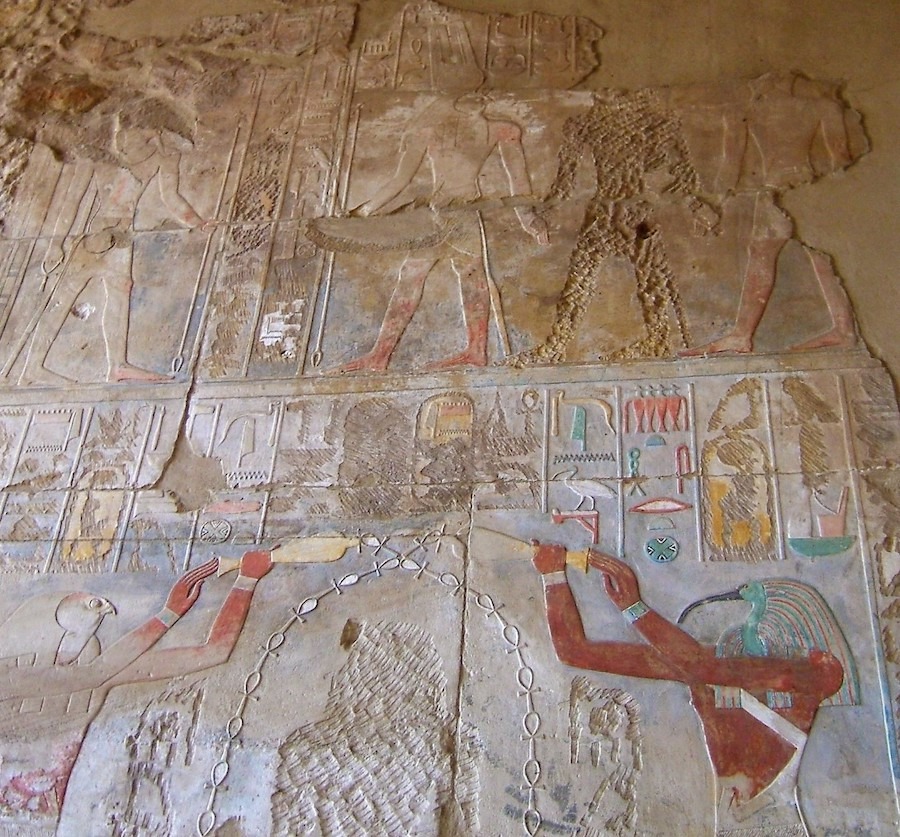
Figure 23 – Wall carvings with color
Then we have obelisks. Imagine today, fabricating a modern 97 ft-tall granite obelisk (Figure 24) in one piece that weighs about 320 tons, then moving and lifting it onto a barge, shipping it down the Nile, and finally moving and erecting it. Just standing up a 97-ft obelisk is a major undertaking! Now imagine doing that in c 1473 BC (Figure 23) with no heavy equipment! The obelisk in Figure 24 was erected as a monument to Hatshepsut, one of the few female pharaohs (more about her later).
The complex at Karnak was never finished. Imagine the delay charges; 3,000 years and still never completed. And along the way, something gets broken. Imagine replacing the broken obelisk in Figure 25.
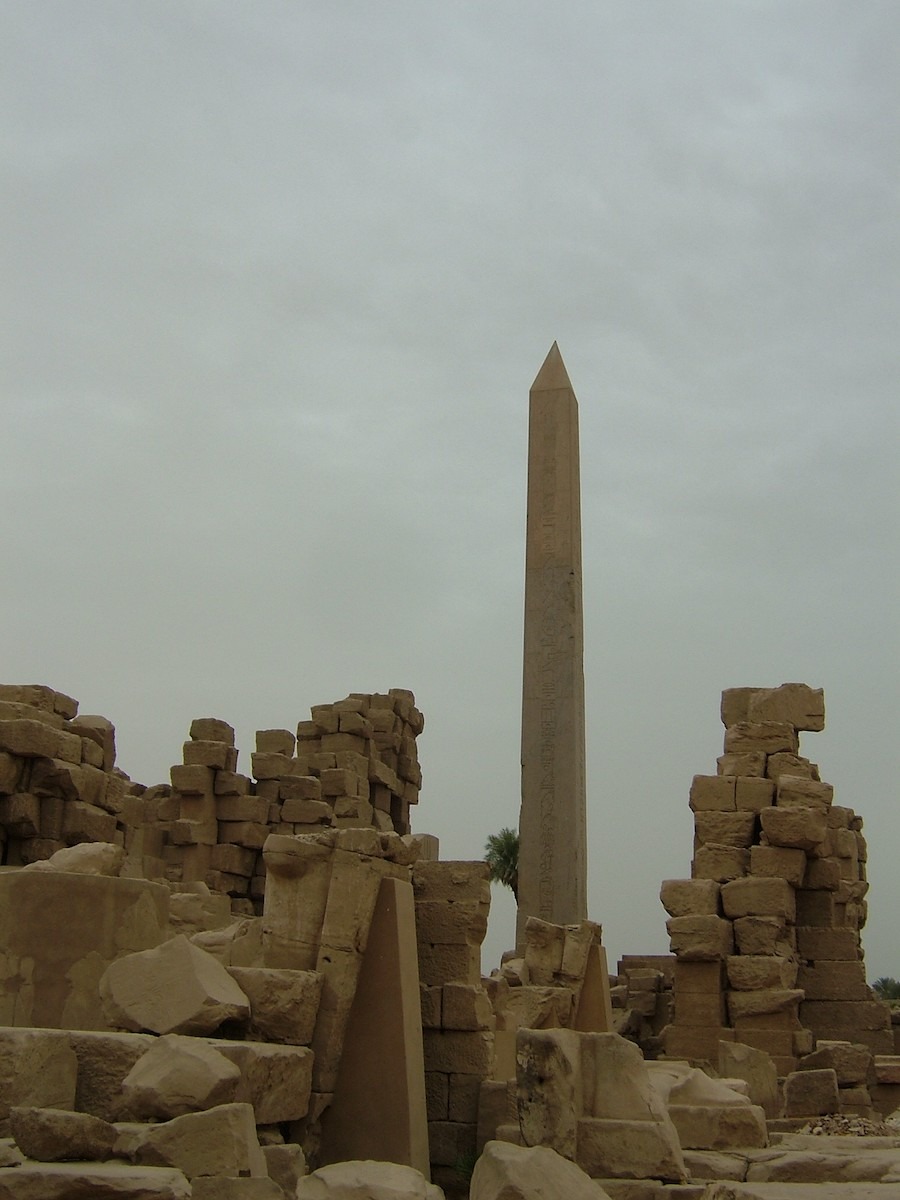
Figure 24 – 97 Foot obelisk to Hatshepsut
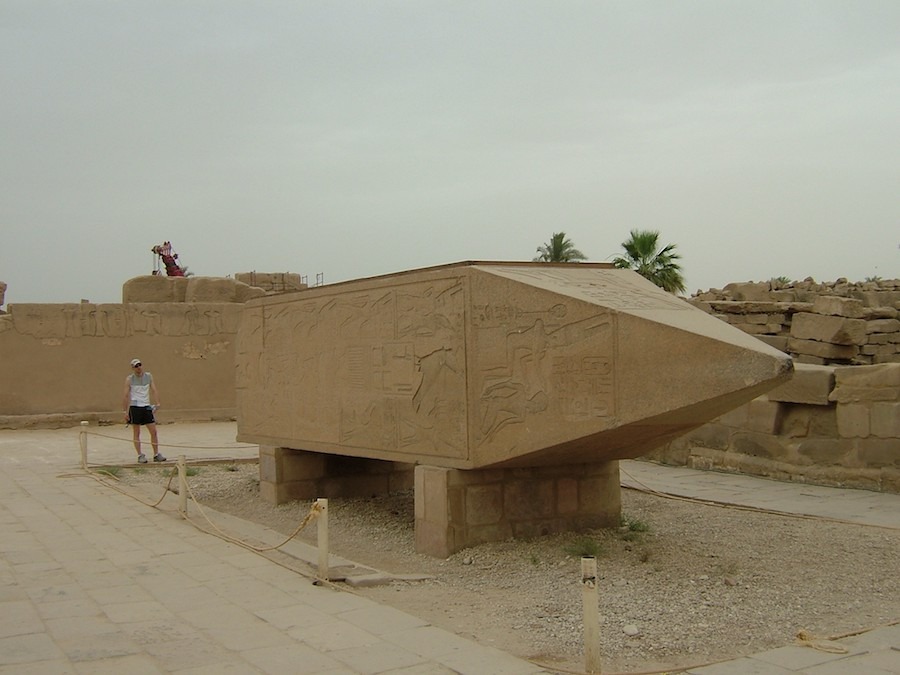
Figure 25 – Broken top from granite obelisk
In Egypt, like many other countries, many of the historic sites are missions of foreign countries. These missions often fund and perform most of the preservation work with the oversight and approval of the government. The Karnak site is a French mission.The French have been restoring the site for years. The numerous statues and monuments are a challenge to move and protect. You feel like you are among massive chess pieces (Figure 26). The tower crane is an essential piece of equipment.
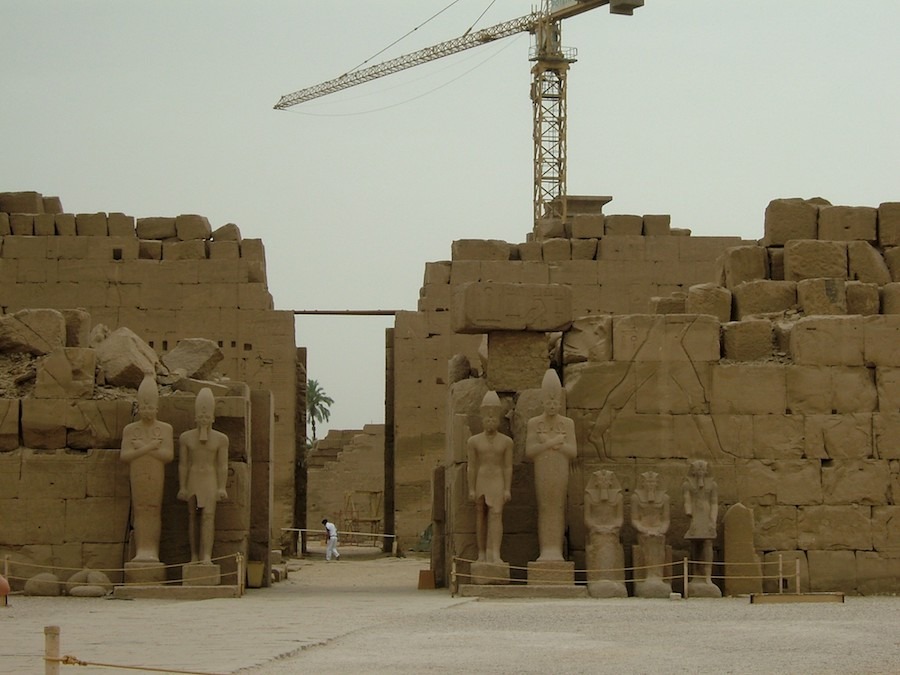
Figure 26 – Statues of Karnak
Leaving Luxor is difficult because there is so much more marvelous masonry to see! But, we cross to the west side of the Nile to our next site at Deir el-Bahri (#7 on map). Figure 27 shows the mortuary temple of Hatshepsut with its enormous colonnade. Hatshepsut was probably Egypt’s second female pharaoh. She reigned approximately 22 years and was a prolific builder, including the obelisk at Karnak.
Every column on the upper tier of the temple was constructed with a statue of the pharaoh (Figure 28). Notice the fake beard. The stone carvers were kept extremely busy with both buildings and statues throughout Egypt.
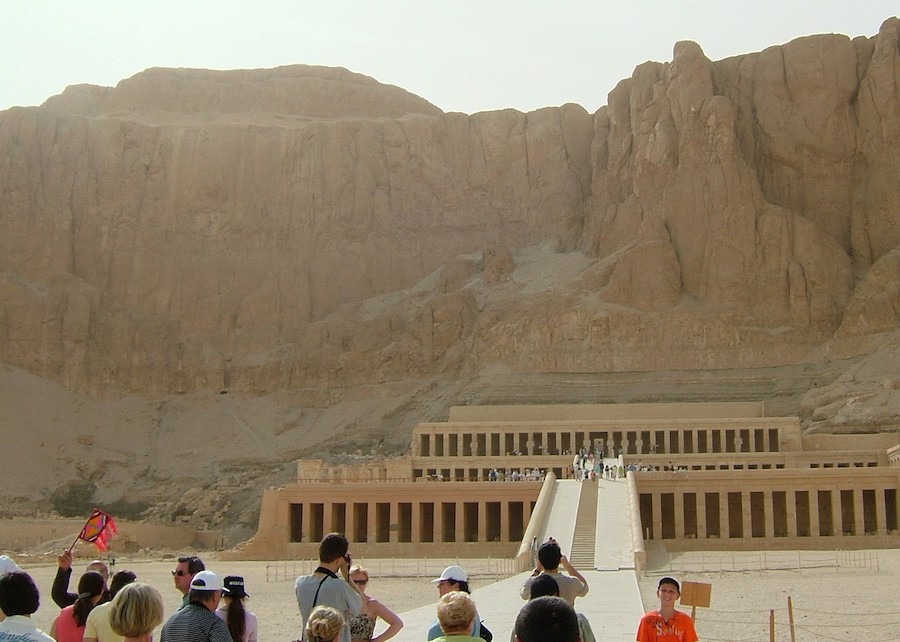
Figure 27 - Temple to Hatshepsut
Following Hatshepsut’s death, her statues were destroyed and buried nearby, her monuments were defaced, and her name was erased from historical records by her son, the new pharaoh. Archeologists did not know much about Hatshepsut and her story until about 1822 AD when they transcribed the many carvings in the temple. In 1903, her tomb and mummy were found in the Valley of the Kings, but archeologists did not know it was her until the mummy was identified in 2007.
Figure 29 shows some of the statutes that have been restored by Egyptian and Polish conservators (This site is a Polish mission). Notice the bases of the missing statues.
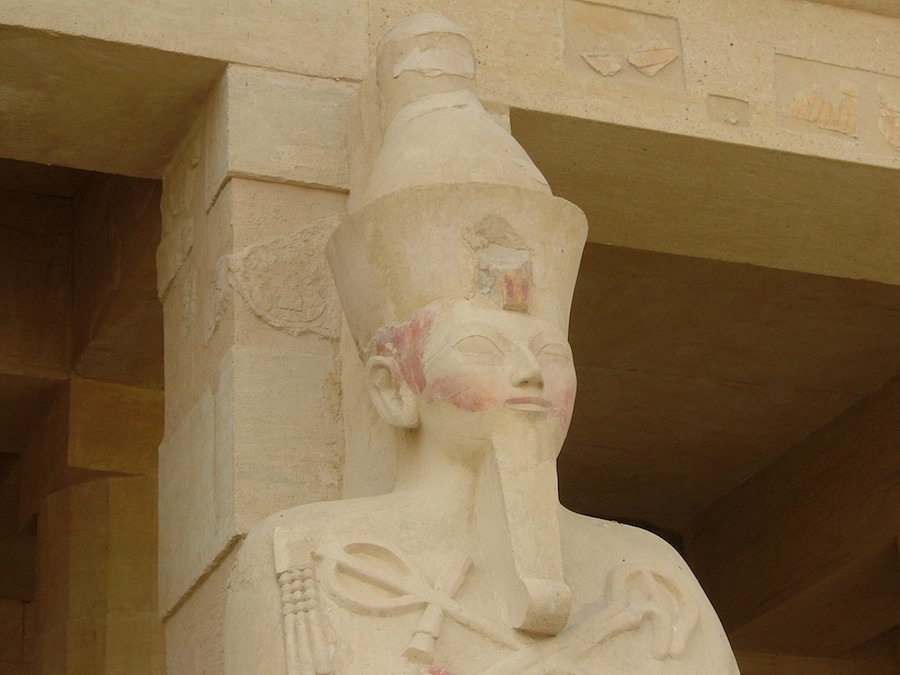
Figure 28 – Pharaoh Hatshepsut
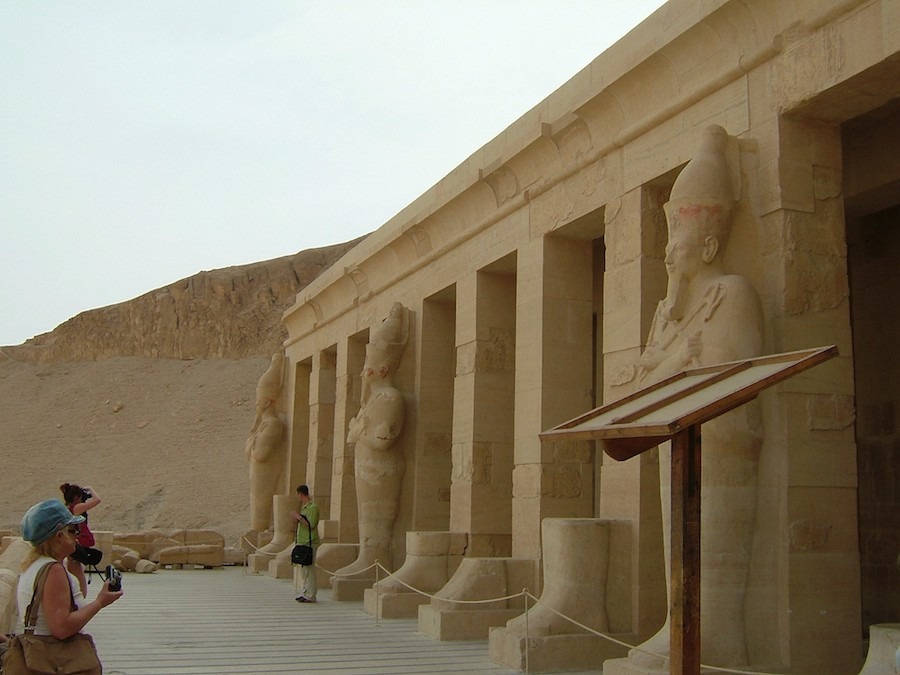
Figure 29 – Hatshepsut statues
From a restoration perspective, Figure 30 shows a gypsum tell-tale installed by modern conservators to evaluate movement. Figure 31 shows a stone column strengthening method using a steel strap. Simple, non-invasive and reversible, this method is a very smart solution.
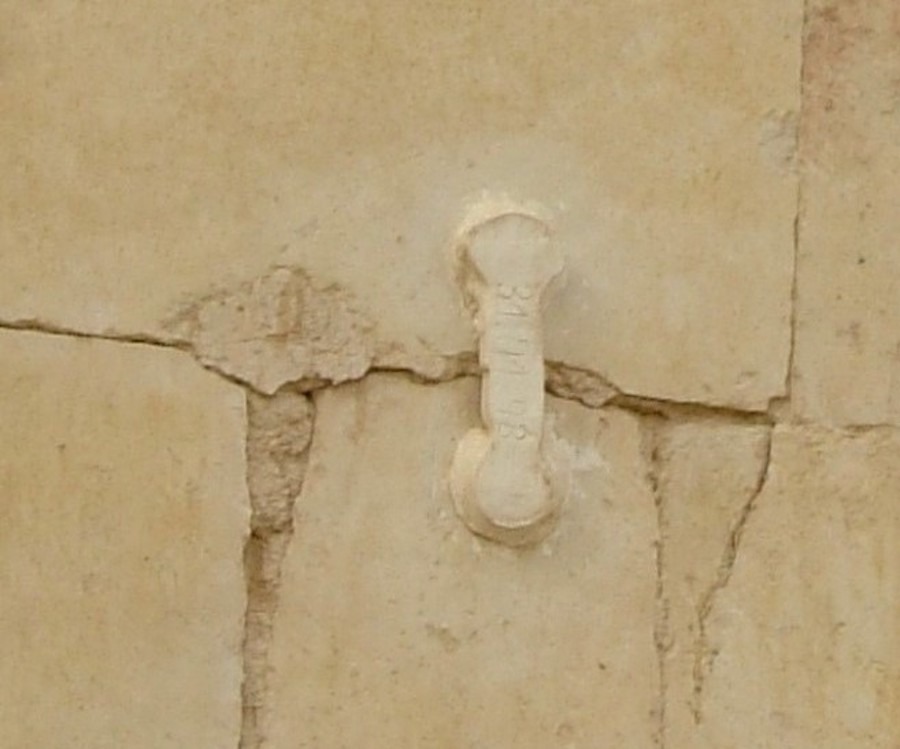
Figure 30 – Crack tell-tale
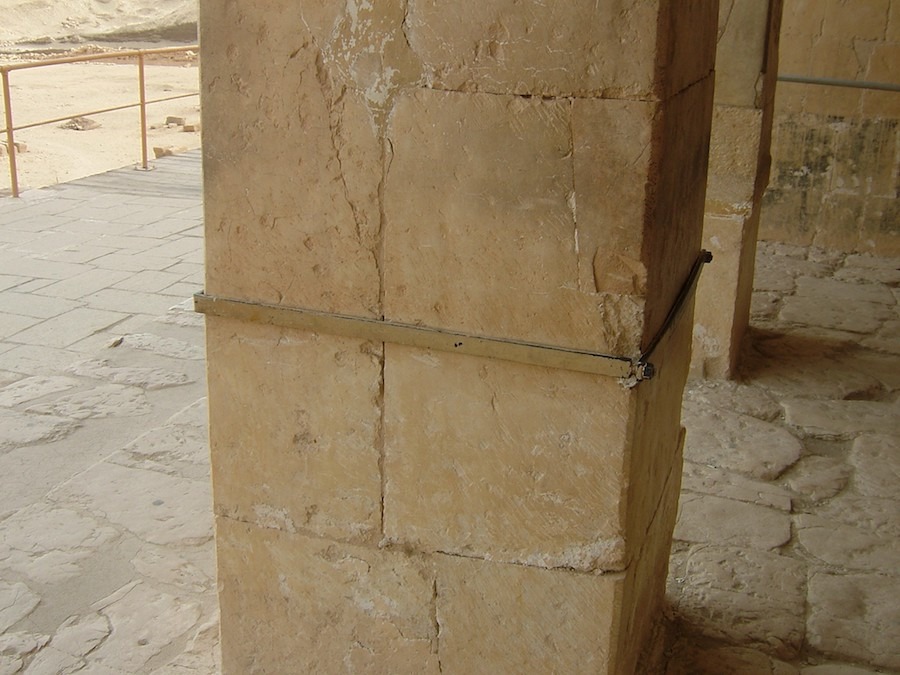
Figure 31 –Column strengthening
Our next stop is on the other side of the mountain where we find the Valley of the Kings (just west of #7 on the map). After centuries of building pyramids to bury the pharaohs, Egyptians realized that the pyramids invited robbers. So, the decision was to move burials to a hidden location near the desert. Thus, burials were moved to the Valley of the Kings where palatial tombs were excavated deep underground. There are currently 63 known tombs; some are simple pits, the largest has 120 chambers. (Many don’t realize there is a nearby Valley of the Queens with approximately 80 more tombs.)
While there is little masonry visible on the exterior to the tombs, the marvelous masonry is inside. Figure 32 shows modern tomb entrances. Each tomb is carved into the mountain and the chambers are embellished with ornate masonry construction. Figure 33 shows a graphic of the tomb of King Tut. King Tut’s tomb was discovered in1904 and contained many valuables that can be seen in the Cairo Museum.
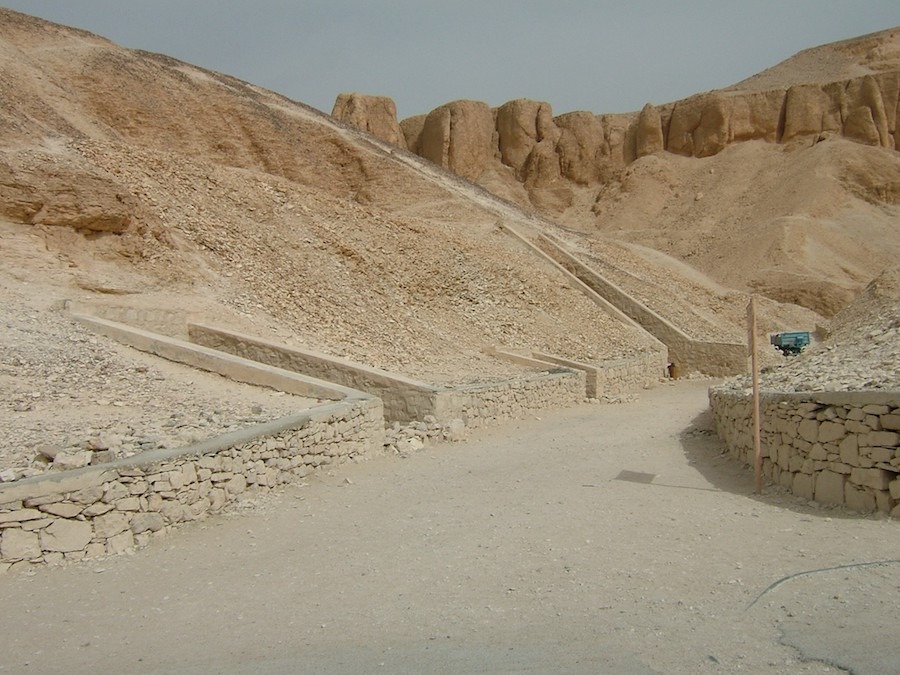
Figure 32 – Valley of the Kings
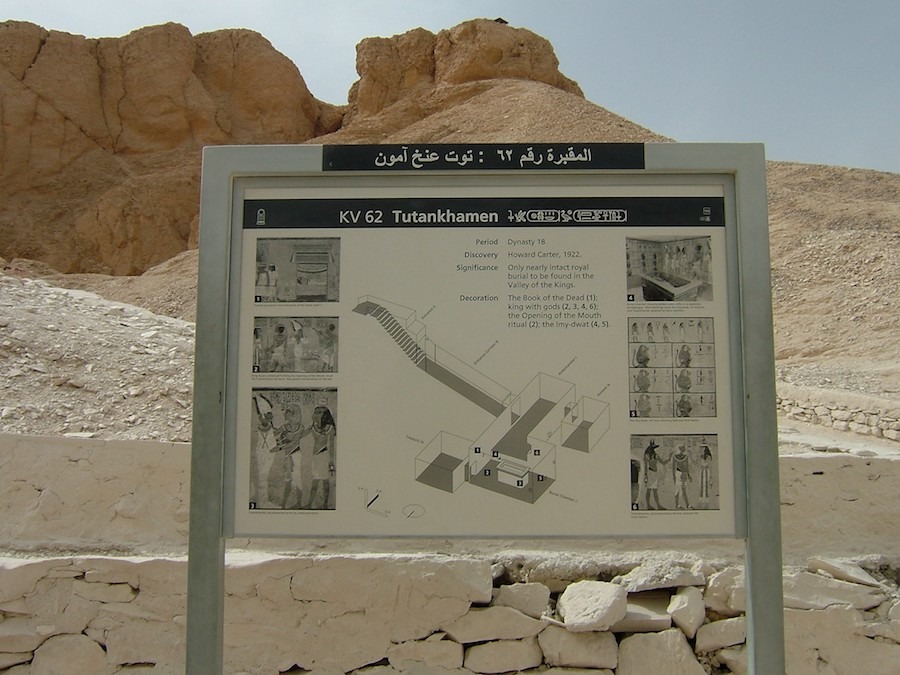
Figure 33 – Tomb of King Tut
Now we go onto the Giza Plateau (#8 on map). You can’t visit Egypt without a trip to Giza which is across the Nile from Cairo and has the Pyramids and the Sphinx. I’ve been there four times and I still haven’t seen everything I’d like to.
Figure 34 shows the three most famous pyramids; on the left is the Great Pyramid to Khufu (c. 2,500 BC). It is the oldest and only remaining of the Seven Wonders of the Ancient World. Originally it was about 480 feet tall, but due to the loss of its exterior stone it is currently about 455 feet. The Great Pyramid was the tallest structure in the world for nearly 3,800 years. It lost that record to the Lincoln Cathedral in the United Kingdom in 1311AD until the steeple collapsed in 1549 AD. Then the record went back to the pyramid until the construction of the stone masonry Washington Monument (1884, 555 feet) and the brick Anaconda Smelter Stack in Montana (1918, 585 feet).
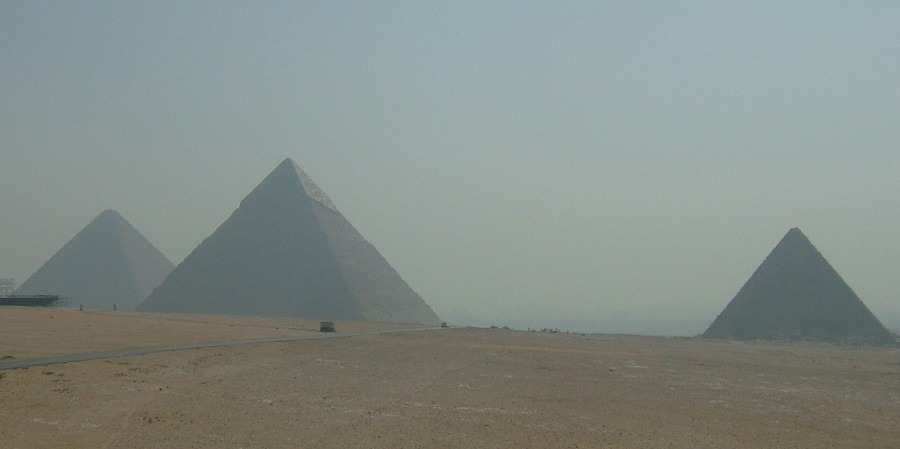
Figure 34
Figure 35 shows a close-up of the base of the Great Pyramid with its limestone blocks. Each pyramid had a casing of highly-polished white limestone (see top of center pyramid on Figure 34). The stakes in Figure 35 locate the former line of the casing stones.
Figure 36 shows several blocks and the joints are very tight, an amazing feat for the time as well as today. The casing stones are reportedly flat within 1/100thof an inch. Some stones were laid in a mortar mixture for leveling. The mortar has been analyzed but never duplicated, yet it remains intact today.
So where are the casing stones today? They were quarried away after many were loosened by an earthquake in the 1300s. You can see them in Cairo in various constructions.
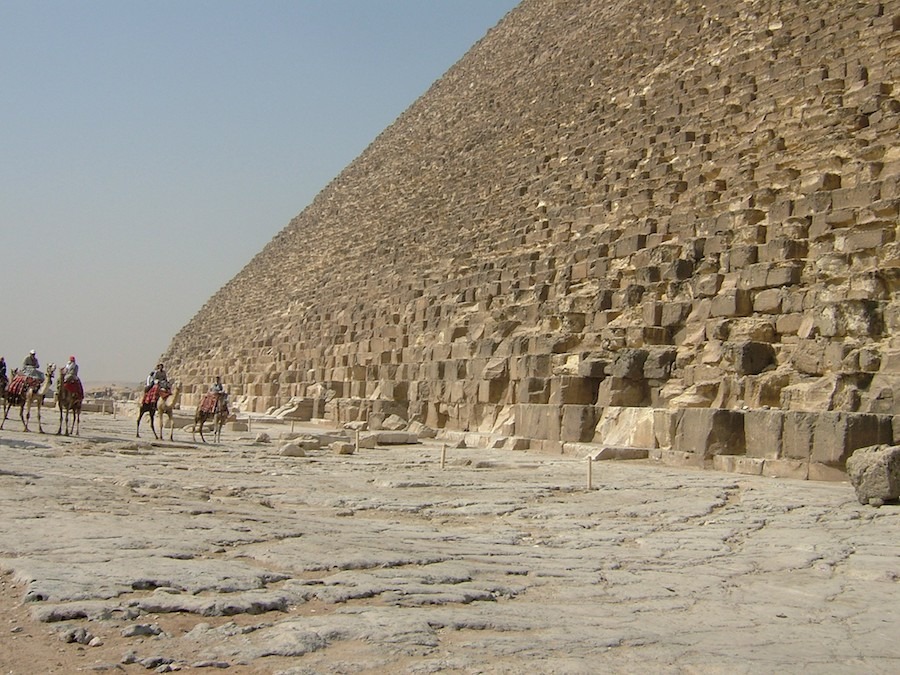
Figure 35 – Base of Great Pyramid
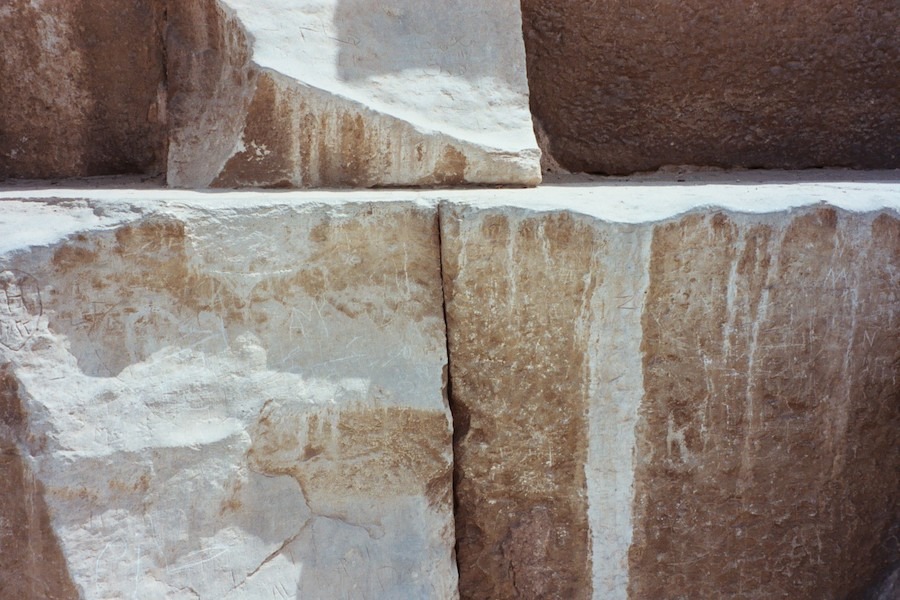
Figure 36 – Tight joints
While the interior passageways of the pyramids are sometimes open to tourists, the passageways are tight (claustrophobia reigns), there is no ventilation (other than what enters the passageway with you), the temperature remains a constant 68 degrees (talk about thermal mass), and there are no real contents to admire. It’s best to enjoy the outside.
Nearby is the amazing Great Sphinx of Giza (Figure 37) with the Great Pyramid behind. There are innumerable sphinxes in Egypt but none more famous that this one. I used this photograph so you might see that this monument is carved out of the stone, not built. The monument is actually composed of three strata of stone. Each stratum varies in quality with the best stone above the neck.
Over the centuries, the sphinx has been covered and excavated many times. Through wind erosion and moisture damage (while buried), the stone has deteriorated badly. Figure 37 shows masons installing a stone veneer to protect the damaged stone. See the blow-up on Figure 38 where the paws are already completed.
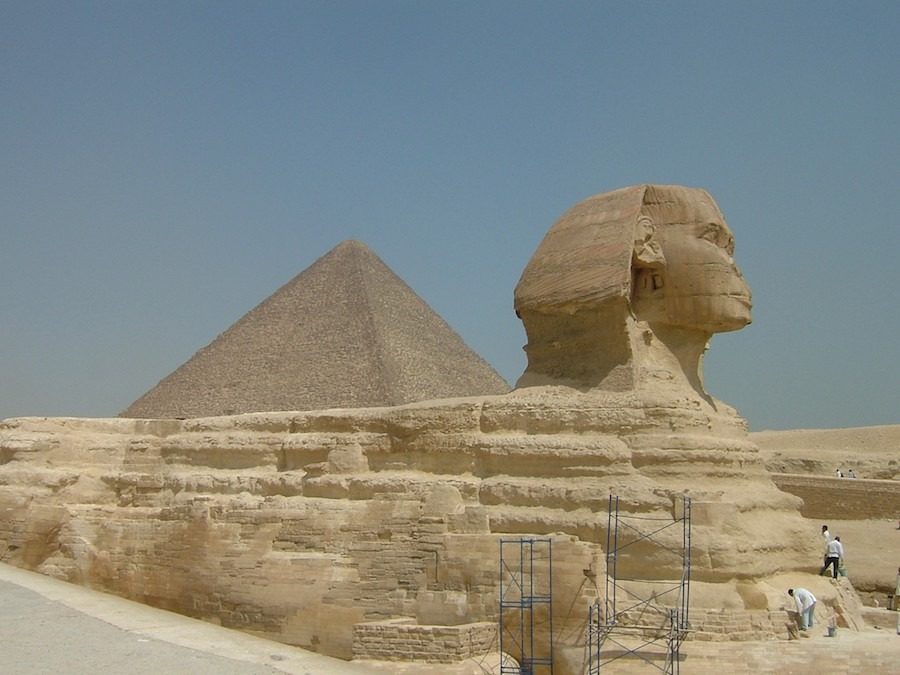
Figure 37 – Sphinx
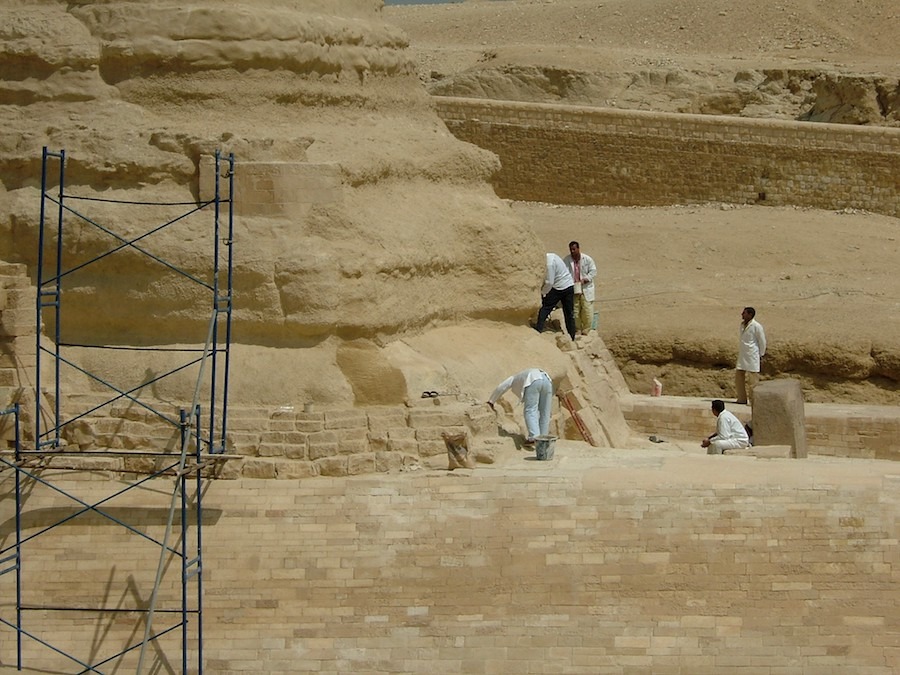
Figure 38 – Veneering the Sphinx
It is interesting that the Giza Plateau is the one historic site in Egypt where there is an “Egyptian only” rule for masons. Foreigners can serve as consultants or provide non-destructive testing but Egyptians do the work.
Our last stop on this short tour is Cairo (#9 on the map). We only have space here for one site, the Cairo Ayyubid Wall restoration. Figure 39 shows some of the deteriorated limestone. Notice there are no toe boards on the scaffolding. Hard hats and protective clothing and steel toed shoes are optional; no OSHA here.
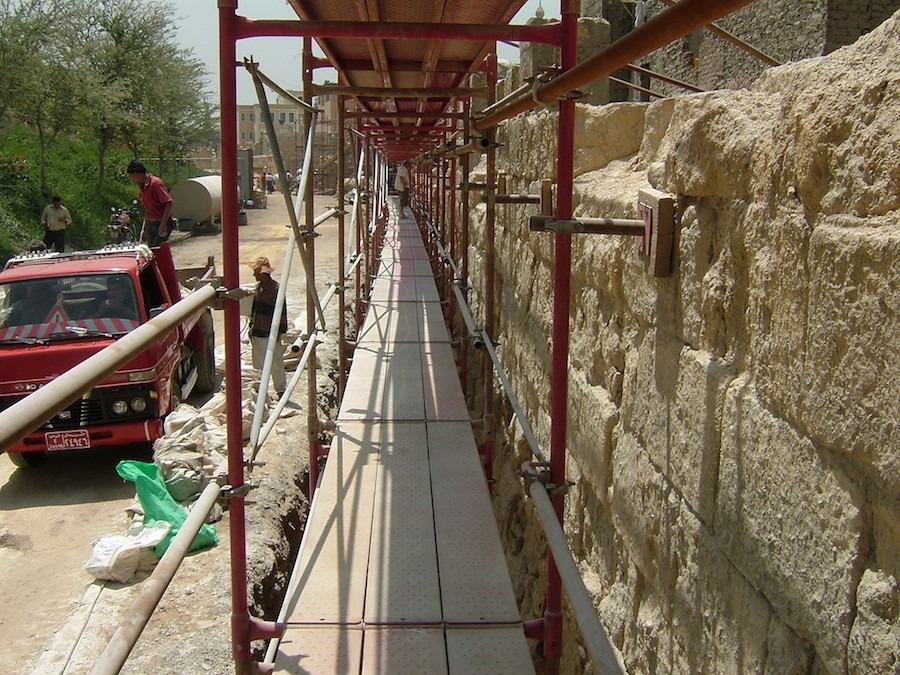
Figure 39 – Deteriorated limestone
The restoration included approximately 1 mile of fortress wall dating from about 1176AD. Figure 40 shows a completed section and the new veneer (Figure 41) that was mechanically anchored is evident by being lighter colored.

Figure 40 – Completed section
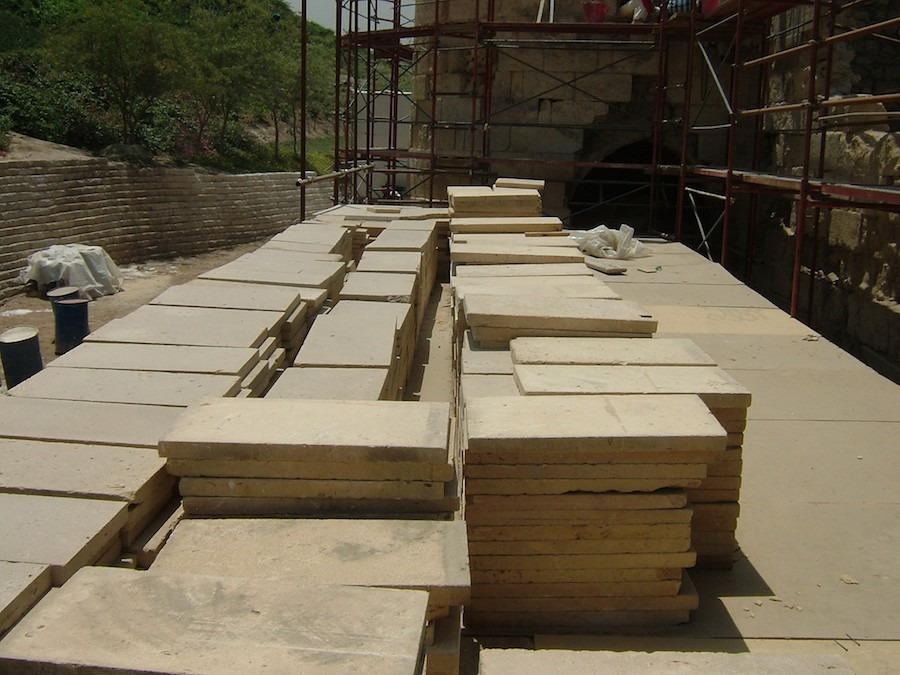
Figure 41 – Limestone veneer
It was too tempting to not explore the interior passageways of the walls. Figure 42 shows a marvelous masonry detail. The openings all have a special stone above the lintel. This stone functions as an arch to relieve the load onto the lintel; all done 1,000 years ago.
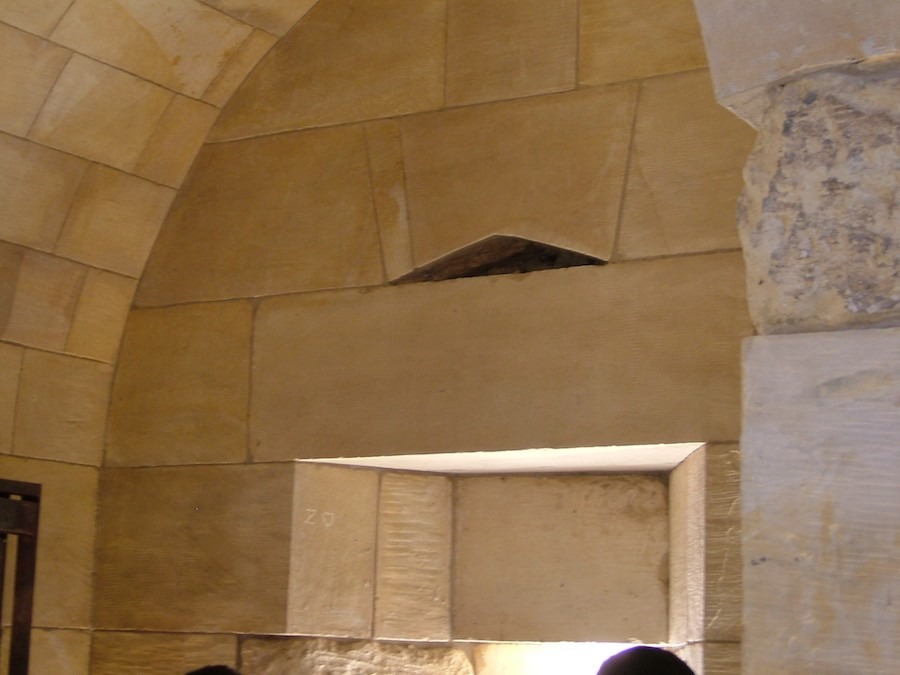
Figure 42 – Relieving arch over lintel
This was a long article but there is much more to Egypt with its marvelous masonry. One undeniable fact is that the Egyptians have wonderful craftsmen who have produced amazing masonry works over millennium.
I hope you found the sites and masonry interesting and it encourages you to visit Egypt someday. We still invite you to send in your favorite examples of masonry construction from around the world. Keep in touch!
Words and Photos: David Biggs, PE, SE